Blur
Boastful

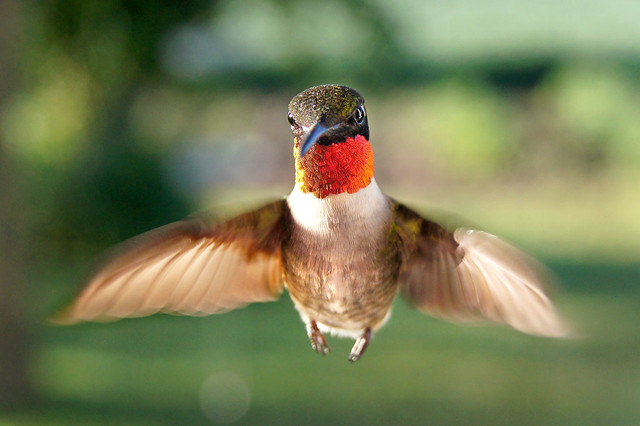
This male, Ruby-throated hummingbird was showing off for me. I love it when the light hits their gorget just right and you get a flash of that iridescent, ruby-red color they derive their name from.
For bonus points…
gor·get (gôrjt)
n.
1. A piece of armor protecting the throat.
2. An ornamental collar.
3. The scarflike part of a wimple covering the neck and shoulders.
4. A band or patch of distinctive color on the throat of an animal, especially an area of brightly colored feathers on the throat of a bird.
Click on the image to see a larger image and those brightly colored feathers on the throat in greater detail.
Pops Quick Tip – Keep Your Camera Steady
More great digital photos are spoiled by “blur” than anything else. It’s disheartening to have a wonderful composition ruined by blur. For clear, sharp images it takes a concerted effort to hold your camera steady and avoid “camera shake.” It requires practice and concentration to free-hand it, especially in low light conditions. Still, as difficult as it may be, nearly everyone can improve.
One common mistake is attempting to compose a shot using the LCD screen, holding the camera at arm’s length. It’s almost impossible to hold a camera steady at arm’s length. Instead, use your camera’s viewfinder, holding the camera firmly anchored to your cheek and forehead, using both hands.
For greater stability when free-handing it, keep your elbows firmly against your body. (Your best bet if your camera doesn’t have a viewfinder.) Often, I’ll steady a shot by holding my camera against a wall, a pole or setting it on a solid surface. If you’ve got them, use a tripod or monopod in true low light conditions.
Your trigger technique is also critical. When snapping the shot, relax – don’t tense up. Slowly and gently press the shutter, being careful not to jerk the camera when you depress the button.
Blur is the curse of digital photographers. Employ these techniques to steady your shots. I still fight blurred images, but I’m getting better at it.


